Sunday, July 29, 2012

iPad/ iPhone case

Hello readers (all 2 of you), a while back I showed you a template I made to cut paper for my clear iPad case. I was so excited that I could change it all the time and never get bored with it. The truth is that I never changed it, not once. It was such a huge pain to cut out all of the little pieces. I loved the idea of it though so I decided to try it out with my phone and see if it was easier. I got a bumper case with a clear back, it's white so it matches my phone. I got it home and found that this one was going to be really easy. But then I figured I could make it even easier and have my Cricut cut it for me. I played around with cricut craft room for a while, it took 8 attempts to get it perfect. It won't round the corners correctly so I do that with my corner rounder. Other than that it's a square with a rounded square cut out in it.

This is the new phone case and the old iPad case. I think the phone turned out really good.

I have an obsession, I think I change it every other day (it is currently cupcakes). It's nice because I don't get bored with it as easy (notice they are all pink? Oops.).

Now, after I got my phone all hooked up, I thought why not try and do that with my iPad. This one took much longer and was a pain. But I got it to work. I am quite proud that I made this work, it still needs a few small adjustments, but it's almost perfect. I have to round the corners of this one with the corner rounder too.


Now if I want I can have a matching phone and iPad cover.

Thats all I have for now. I do have one more finished project to share with you, one that is waiting on a little boy to make his arrival, and a few in progress.

Sunday, July 22, 2012

TP Art

After years of talking about it (yup, I had this idea LONG before pinterest was around) I finally finished a toilet paper roll project. This was the third time that I saved rolls, the other two times I got sick of waiting and threw them away. I have seen many tutorials on how to achieve TP roll art and many different shapes that you can make. I decided to go with 4 point flowers that make circles when connected. I will show you what I did but first I have a little rant.

I went to Hobby Lobby this past Friday and right as I walk in the door I saw this...
Thats right people, they have started setting Christmas displays. Um..... IT'S FREAKING JULY. I find this absolutely ridiculous!!! I get upset when they set Christmas in October. I don't think that there should be anything Christmas related until after Thanksgiving (my favorite holiday), preferably not until December 1st. I tell my friends that I am Scrooge until December. Now that I have complained about that, back to the project.

First I marked both sides of the roll at 1/2 in, which gave me 8 petals plus a little extra (which I threw away).

Then after I had all of my petals cut I started on my flowers. I used regular school glue. I have seen many different types of clips used, cloths pins seem to be popular. I have a ton of pin curl and roller clips so that is what I used. 


After they dried I took the clips off and glued them all together 6x6, putting the clips in the new glue spots.

Time for paint!! I decided to go with black spray paint. It took 1 can per piece (so 2). It sill isn't completely covered but it's good enough. If I do it again I will try using paint and a brush.

The finished projects on my wall. I think they look pretty dang good. They don't look like TP rolls thats for sure.

Close up of the finished project.

I acquired a battle wound while hanging one of these. I was standing on the couch to hang one of them. When I stepped off the couch I landed on my inhaler. I have no idea why my inhaler was on the floor (I blame mu husbands cat). Now I have a huge swollen spot that is super tender. I thought that it was going to bruise but it hasn't started changing colors yet so maybe not. Either way it hurts like hell.

I have a few other projects still, one that SHOULD be done soon, but every time I say that something crazy happens. As well as a crochet project that I am working on. Thanks for reading, talk to you soon!!

Friday, July 20, 2012

Catsup

So, I have been terrible with writing here. I have been continuing to do craft projects so I have lots to share. I am going to use this post to show all of the stuff that I have done lately and I will type a little tidbit about each thing. If you want to know more please ask me, I am always happy to share about my craft projects.

So since I am going to put a bunch of stuff in one blog I am going to go back to some stuff that I skipped as well. First up, my brothers birthday, this happened in March and I just skipped over talking about it. For Christmas my brother got what I think is called a duck blind, I call it a fort. So I made him this sign for his "fort". It's paper, craft wood and mod podge, pretty basic. I think he said he was going to hang it in his garage, I don't really know what he ended up doing with it.

The card to go with it, I don't really have much to say about the card. It's blue, it has fish on it....

The next skipped project is my dads birthday. I made him a super cute Angry Birds card. I found the idea HERE. Instead of putting them all on a card I decided to make a round card and just make the red bird. I don't have many punches, I needed them bigger anyway, so I just cut shapes on my Cricut, then followed what she did.

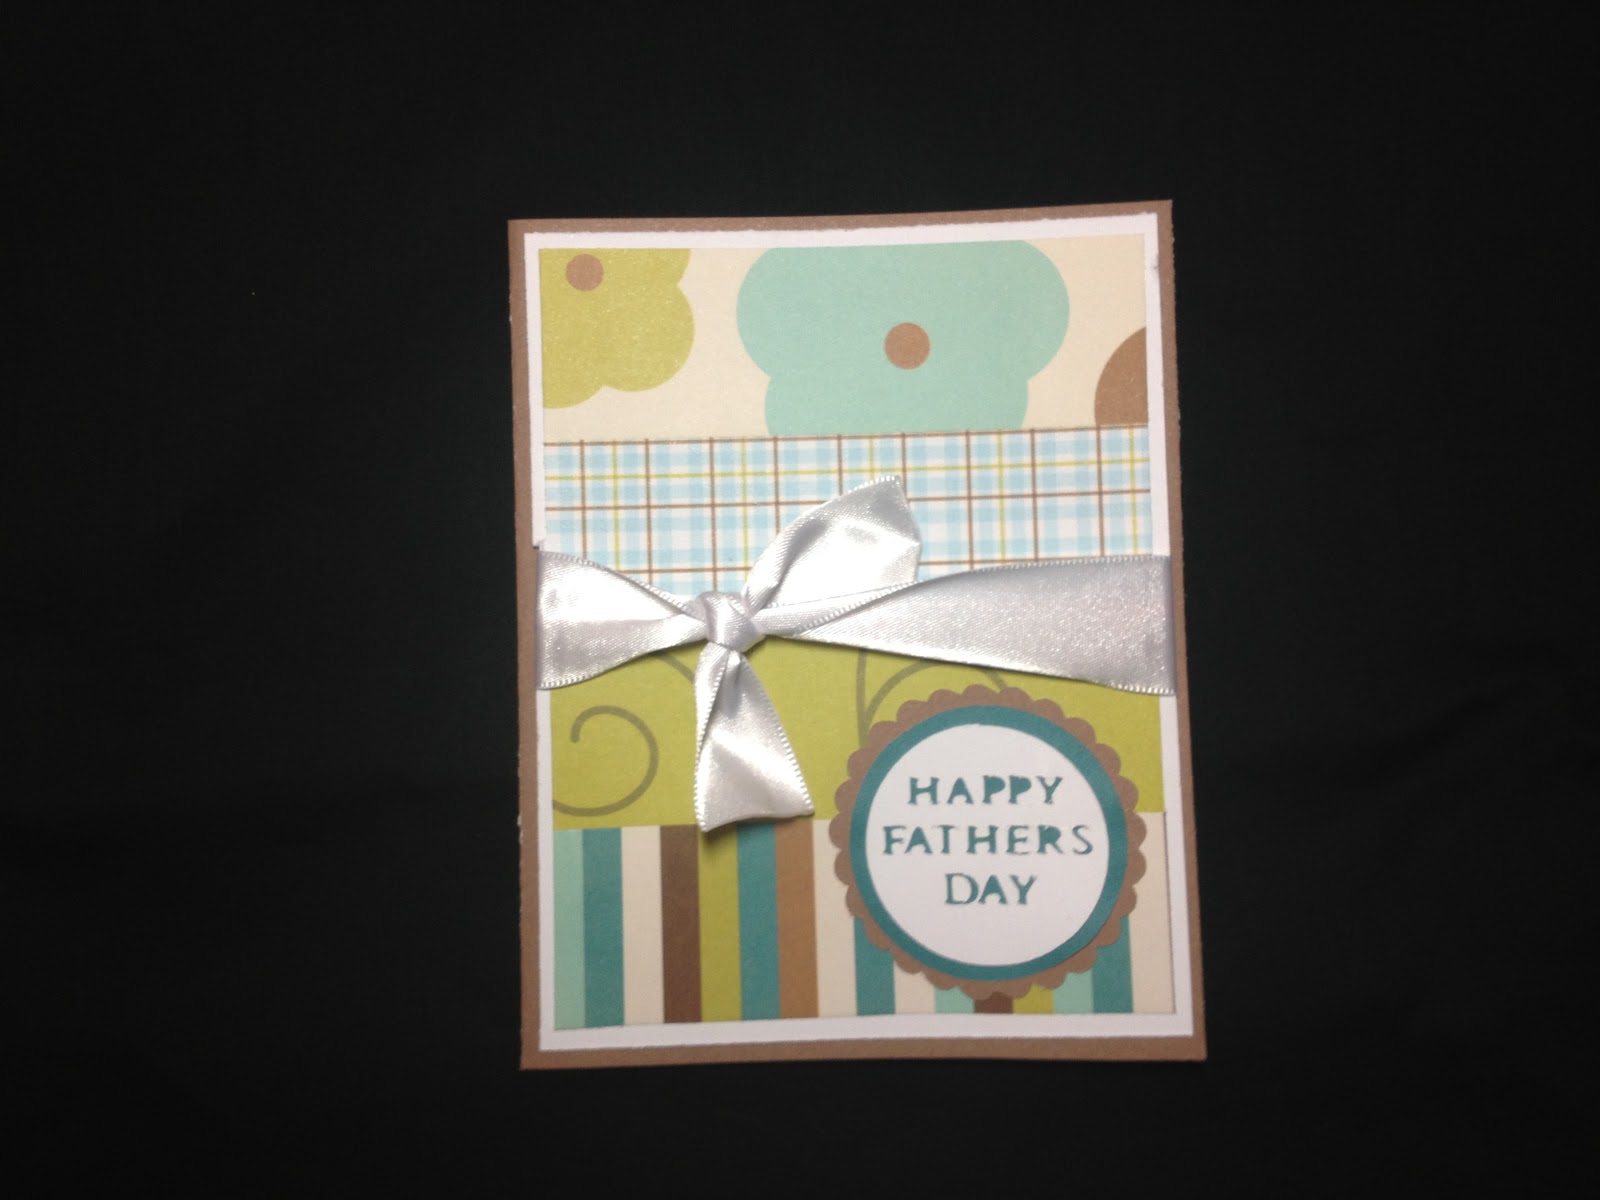
I think that catches me up on skipped projects so now onto things that I just haven't shared with you yet. Up first... Fathers Day.

This one was for my step dad. The quote reads "Any man can be a father but it takes a real man to be a dad". It's fitting for us. I stamped the quote with individual letters, cut the paper by hand and the red is shiny ribbon.

This was for hubbys step dad. It was paper scraps and I cut the sentiment with my cricut.

This one was for hubbys dad. It was actually being mailed (not in a box) so it doesn't have any embellishments. The quote is what mattered most on this card "Small boys become big men through the influence of big men who care about small boys". It is one of the more simple and "boring" cards that I have made, I am not really a fan but I was attempting to "kiss" (Keep It Simple Stupid).

The card that I made for Joshs mom for her birthday is one of my favorites that I have ever made. I combined two of my loves, crochet and cards. I got the idea from a headband display, I thought it would make an adorable card. I made the flower out of embroidery floss so that it wouldn't be huge.


 I used a really old flower punch that I have had since the beginning of time and striped paper that came in the same pack as the paper used on the card and envelope so that they would be matching colors.

I made my first vinyl wall hanging. It is in my kitchen so it of course has a coffee theme. I am very pleased with the way that it tuned out. I have a few more vinyl ideas now, I will share with you if/when I finish them.

The last one that I want to share today it a wedding card for my friend Laura. I knew that I wanted to use the owl punch but figuring out what I wanted to do with it was a little hard. Then I saw that someone made a little wedding dress for one and I instantly knew what I wanted to do. He wore his blues so I spent the time to make little tiny dress blues for the owl, I don't think I have ever spent that much time on something so little but I am freaking proud of how it turned out.

Her colors were yellow and blue, so that is why the owls are yellow :)
 Close up of my bride and groom owls. I am very proud of them.

 I loved this rub on and I was thrilled that it just happened to be blue.

Well... That catches us up. I have not been wanting to post because I was so far behind. Hopefully now that I am all caught up I will have the want to talk about my projects again. I have quite a few that are in the final stages of being complete and a few that are waiting to be delivered. I hope to talk to you again soon! Thanks for reading.


Monday, June 25, 2012

Hand

So, I know that it has been almost a month since I posted last. I honestly haven't been doing much worth talking about. I know that I keep mentioning my hand but I haven't really gone into detail about it yet. In January/February (yes, it's been that long) I noticed a dry itchy patch on my middle finger on my right hand. I figured it was dry skin and used a lot of lotion. It continued to get worse so I figured it was an allergy (contact dermatitis), so I changed all of our soaps, my lotion, etc. It continued to get worse, I tried Hydrocodone with no improvement. 

In March I had my first doctor appointment to address the issue. At this point my middle finger was HUGE and it has spread to almost all fingers and a spot on my wrist. I was told that it was a fungal infection and given Lamisil cream. The swelling went down a tiny bit and the rash seemed to clear up. Then I woke up on day and it had EXPLODED. It was 100000000x worse.

It was oozing, and quite nasty. My fingers were so swollen I couldn't make a fist and it was really painful.

I made another appointment to have it looked at again, by this point its April. I couldn't wait any longer and went to urgent care. The doctor there said that it was infected and I had eczema. So I was prescribed a very strong antibiotic and a steroid cream. I was thinking that I had found the miracle cure, it cleared up, although the swelling hadn't gone down but I figured that would come with time. I was instructed to use the cream for three weeks 3-4 times a day. I did exactly as I was told. Less than 24 hours after my last cream application it was back in full force.

So now we have made it to May, I am over this crap on my hand at this point. I have yet another doctor appointment with the first doctor. He agrees with the urgent care doctor that it's infected and some form of eczema. So another round of antibiotics and the same steroid cream., this time two weeks and 1-2 times a day. I saw very little improvement this time and called for a referral to a dermatologist.

Well this brings us almost up to date, I had my appointment with the dermatologist a week ago. He thinks it's contact dermatitis (which it what I thought it was in the beginning). So now I am on a super strong steroid cream. I am not convinced that this is the solution because I don't want to get my hopes up. My fingers are all a normal size for the first time in months and the rash is 95% taken care of. I go back in a week for a follow up. I will keep you all updated on what happens.

As you can imagine this has put a damper on my crafts, I do have fathers day cards and a birthday card as well as a vinyl sign for my kitchen to share with you but that will be another day as I feel that I have talked enough for this blog. Thanks for reading. I will be back in a few days to talk about craft projects

UPDATE 7/22/12:

Well, this crap is unfortunately still on my hand. I have been to the demonologist twice, he didn't really seem to know much. I have been putting cocoa butter and oatmeal lotion on it like a crazy person and it is keeping it at a comfortable place for the most part. If it flares back up I will be going back to the dermatologist office and talking to someone else.


UPDATE 10/13/12

Well, yesterday I finally got some answers. My dermatologist diagnosed me with Dyshydrotic Eczema. Unfortunately there isn't much that can be done for it. But at least now I know what it is, which is a relief.

Wednesday, May 30, 2012

Menu Board

So forever and a year ago (ok, so it was a few months) I made a little menu board for my kitchen to keep track of what meals we are having what day. I made it out of a frame that I had sitting in my closet. It was one of my first Cricut projects. I was getting a little frustrated because I didn't have enough room to write down all of the meal details (the main dish, the side dish and what vegi we are having) and I am very forgetful.

This is the fist version of the menu. It was the only thing in my house that is shiny sliver so it really didn't match. The brown swirly paper matched perfectly though.


I used the same swirly brown paper and added a cute coffee cup in the colors of my kitchen. I used a document frame to give me the most amount of room possible so that I can keep track of all of the parts of the meal.


The words across the top are a little crooked. I am going to say that it gives it character even though it is driving my "symmetrical brain" as I call it (or OCD as Josh calls is) crazy so I will have to fix it later. But because it'c glued on I will have to redo the entire thing and I just wasn't in the mood for that at them moment.

It matches my coffee kitchen really well and the frame fits perfectly on the little wall above our water cooler. I was actually a little worried that it wasn't going to fit when I first brought it home.


I love my little menu board. I love that it has a place to put all of the elements of the meal as well. I am trying to make an effort to make a vegetable at every meal. We eat quite well though. Mostly chicken with 1 fish, 1 red meat, and one meatless meal per week. I love the idea of "Meatless Monday", although ours is rarely on Monday. Today is slow cooked stuffed peppers, they sounds AMAZING. It's new so we shall see. 

I am debating on a saying to put in my kitchen on the wall. Something coffee related obviously. I am not sure what I want it to say yet. When I decide and get it up I will be sure to share. 


Monday, May 28, 2012

Kitchen Drawers

As many of you know, I hate my kitchen. The person who designed the cabinets in my kitchen was a man who had never been in a kitchen in his entire life. Not only is it a bad design it's tiny. My laundry room is huge though. I don't know why they didn't make the laundry room smaller and the kitchen bigger. Oh well, I am trying to make the best of it. I think the worst part of my kitchen is the drawers. I have very few of them and they are only 6 inches wide on the inside. I know what you're thinking, "6 inches? Thats ridiculous, you're exaggerating, no one would build a 6 inch wide kitchen drawer. It would be useless!"


Now that you know I'm not exaggerating I know what you're thinking "That is really stupid! Where do you put your silverware?" Up until recently I had it on a shelf in my pantry. Which is also where my pans and appliances are since I don't have a cabinet for them and my food is shoved into one little lazy suzan, my cook books, baggies, tin foil, etc is all in the laundry room. I know you're jealous of my awesome kitchen situation.

I got so sick of my silverware being in the freaking pantry (which is more in the hallway than the kitchen) I decided I had to come up with a solution. I searched all over the internet for a small silverware organizer, I can't be the only one with stupid drawers, right? Well, I found a custom one that I could order, but it was a little spendy for what it was. But that got me thinking more on the lines of making one rather than buying one. So that brings us to version 1.0, or I guess technically version 1.5 since I had to recut the notches so my knives would fit.

I made it out of a card board box and covered it with contact paper so no one (ok so that I) wouldn't get card board cuts when trying to get a fork. It got the job done but not very well. It was very flimsy and the knives bent it and would slide under when we opened and closed the drawer. But it got the ball rolling.

I was out cleaning my garage since I actually have stuff out there now (which I HATE, but there is space for it and my car) since I don't have any storage space in the house. I still had a book self sitting out there that the movers broke. When I saw that I had 5 of the backs for the book shelves, they were cheap) it gave me the idea for version 2.0. This material was less flimsy and much thinner.


SUCCESS. My silverware now sits neatly in my drawer. It's not pretty so there may be a version 2.5 :) One of the biggest problems with the first one is that it slid around and the long pieces would move with very little pressure, it also lifted up really easy so the knives would escape from their home. I found a solution for both.

In the front, since you can see it, I opted for clear bumpers. It keeps them from moving side to side.

In the back, since you can't see it unless you stand funny like I did to take the picture, I used a little bit of masking tape. Which keeps it from moving up and down (and side to side really). 

It has been a few weeks and it's still working perfectly. I think I may take it out and put the contact paper on it to make it a little more pretty and cleanable, if this gets dirty I would really be able to clean it off. 

 I am very proud of my little organizer. I hope you enjoyed reading about it. Talk to you soon :) 

Friday, May 25, 2012

Baby "Z"

Last Sunday I got to experience my first eclipse. We were just outside the viewing area so we didn't get the full "ring of fire" but it was still pretty awesome. I am very thankful that our neighbors had a welding mask that they were willing to share so we got to actually see it happening. I tried to take pictures but none of them turned out, they just look like glowing green blobs, not the awesome eclipse that we saw. I did get this picture though. It shows how odd it looked outside, the sun is bright and shining but the shadows are short and it was darker than it should have been. This picture was taken at almost the full eclipse (well, as full as we got here). It was a really cool experience and I got to meet some neighbors who were really cool as well. 

A few days ago I was a little bored so I decided to do some nail art on my toes. I saw cows on Pinterest and thought they were adorable so I now have "Moo Cow" nails. They are a little messy since I was just playing around but they are still adorable. 


It seems like it's baby season right now. Every one I know is having babies. I usually try and make some sort of baby item for all of my friends that have a baby but right now there are so many I wouldn't be able to sleep, eat, or do anything else for that matter. I would have to be a baby item making machine. So if you get left out I apologize, I am doing my best. A co-worker of my husbands that I simply adore is having a little baby boy. I found it a little more challenging to make things for a boy as most hand made baby items are apparently for a girl. I really wanted to make her a blanket but with the skin issue on my fingers I wasn't able to. So he got some adorable booties and a little hat. I am super pleased with the way the card turned out as well.

The booties were interesting to make, I had never made booties flat then sew them together. It was a quite efficient way to make them though. I used THIS pattern for the booties and "I love this yarn" in Seascape Multi from Hobby Lobby

I fell in love with this little hat when I saw the pattern. I was happy that I found one that was good for a little boy too. No bows or flowers. I used THIS pattern and the same yarn.


I love this little card. I think it is one of my favorites so far! I got the idea HERE but made it a boy card. I knew that I wanted to do ducks before I found the card so I opted for this cute little ducky from Cricut Craft Room Basics that came with the program. He has a little rhinestone eye as well. I embossed the white cardstock behind the duck to give it a little more texture.


Well. I think thats all I have to talk about for now. I am sure that I will be back before to long. Fathers day is coming up and I have many ideas running through my head. As always, if you want to know more information on what I used, how I did it, or anything else please ask! Thanks for reading!